
 Labels & seals
 Mugs
Mugs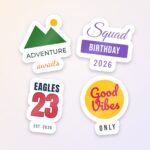 Stickers
Designing Tool Tutorials
Short videos showing how to use the designer. Each one takes less than a minute – press play, then click “Try it” to have a go yourself.
Tutorial 1
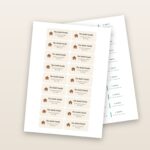
Name labels from a list of names
Type or paste your names – every label on the sheet gets its own name, and long names shrink to fit.
- Open a name label design and go to the Text tab.
- Click “Make name labels”.
- Type or paste your names, one per line (or upload a .txt or .csv list).
- Choose how many labels each name gets, then click “Make labels”.
- Check the spelling and add the sheet to your basket – if there are more names, the next sheet opens for you.
Tutorial 2
Change the text on your stickers
Edit one sticker, pick a font and colour, then copy it to the whole sheet.
- Click the text on any sticker, then “Edit sticker” to zoom in.
- Double-click the text and type your own words.
- Choose a font and a colour from the bar at the top.
- Click “Apply to all stickers” to copy it to every sticker – or “Keep on this sticker only”.
Tutorial 3
Start from a template
Pick a ready-made sheet, then change the words on every sticker at once.
- Open the Templates tab and pick a design (search or choose a category).
- Click “Replace my design” to use it.
- Double-click any text to change it.
- Click “Apply to all” to put the same words on every sticker – each keeps its own picture.
Tutorial 4
Make your own sticker size
Choose any shape and size – the sheet is filled for you, 1 cm apart for cutting.
- Open the “Custom size” tab.
- Choose a shape: circle, heart, star and more.
- Choose a size (or type your own) – it shows how many fit on a sheet.
- Confirm, then fill the shapes with a colour and add your design.
Tutorial 5
Put your photo on a sticker
Add a photo inside any sticker – it’s trimmed to the sticker’s shape.
- Click a sticker, then “Edit sticker”.
- Click “Photo” and choose a picture.
- Drag to move it and use the corners to resize.
- Keep it on this sticker only, or apply it to all of them.
Tutorial 6
Die-cut stickers from your picture
Upload a picture – the background is removed and the cut line follows its shape.
- Open the Uploads tab and upload your picture.
- The background is removed for you (click “Keep background” to undo).
- Choose how wide the white border is.
- Click “Apply to print sheet”, then pick a sticker size.
Tutorial 7
Design a photo mug
Add your photo and words, then see your mug in 3D before you order.
- Open the Uploads tab and upload your photo.
- Drag a corner to make it bigger and drag the middle to move it.
- Add words from the Text tab and pick a colour.
- Click the eye at the top to see your mug in 3D.
Still stuck? Get in touch – we’re happy to help with your design.